Author: admin
Mercury Marine Four Stroke Maintenance
Whether you outfit your rig with a TwoStroke or FourStroke outboard depends on the type of boat you’re running and what your performance needs are on the water. What’s much more cut and dry is the difference in routine service schedules between the two. If you’re considering a FourStroke and want to learn more about how to keep it performing optimally, whether your maintenance is done at home or by a professional, the steps outlined here should help out. We consulted members of the service crew at Toho Marine and Outdoors in St. Cloud, Fla., one of the country’s largest bass boat dealers, for the basics. Luckily, there are some industry standards (and rough guidelines) to follow when it comes to FourStrokes, but some of the specifics vary by make and model. If you decide to tackle it yourself, you’ll want to consult your dealer to make sure you’re following the proper maintenance procedures. And, it’s never a bad idea to simply rely on the dealer to do the maintenance for you. If that’s the route you go, you’ll understand the basics and know what services are being provided after reading this.
Change Engine Oil
If your new FourStroke has been broken correctly (according to Mercury recommendations) and operated for a few months under normal bass fishing conditions, the first maintenance usually occurs at the 100-hour mark. At that time, the engine oil and oil filter should be changed. Only use factory-recommended parts and lubricants such as Mercury Precision Parts. Although FourStroke engines perform similar to, say, an automobile, their needs are drastically different. For example, the oil must be able to withstand extended high RPM. Changing oil is simple. A drain screw is located on the lower gearcase. A special wrench may be needed for the oil filter located beneath the cowling, but it, too, can be easily removed and replaced. Don’t over-tighten when you replace it, and refill with the appropriate amount of oil.
Change Gear Oil
Along with an engine oil change, owners should also change gear oil at 100 hours. The drain and vent screws for this may be located on the lower unit, or possibly behind the prop. In any case, both must be removed to allow all the gear oil to drain. Check the oil for any discoloration (milky means water has entered the gear case) or metal pieces. The drain screw is also magnetic; check it for shavings that could indicate a gear problem. When refilling, gear oil must be pumped back in through the drain hole until it comes out the vent. Wait five minutes and pump a little more in to ensure it’s filled to capacity.
Change Fuel Filters
Fuel filters require initial 100-hour maintenance as well. Large four-stroke outboards include a fuel/water separator filter in the bilge area of the boat. This can be easily changed and should be during this initial service. The Mercury Verado also includes an additional pressurized filter that should be serviced by a dealer, but not until 300 hours.
1-Year Maintenance
Usually, after one year, it’s time for the outboard’s second scheduled maintenance. At this point, engine oil and filter, gear oil, and fuel filters should be changed again. In addition, the water pump should be inspected, and the impeller should be changed by the dealer (while the impeller may be in good shape, simple pump inspection requires substantial labor cost, so the part is changed for preventive purposes). In addition, spark plugs should be inspected and changed as needed. Good plugs will have a bronze coloration and sharp edges. Additionally, some dealers such as Toho Marine will perform further tests as part of their regular 100-hour service, including a computer diagnostic to check for codes that might indicate operating errors, and make sure the motor is firing efficiently. Further service also includes a compression check to ensure there’s no advanced carbon build-up or ring problems within the motor. As discussed, check your user manual for recommended 300-hour inspections and filter changes, as well as belt service at 1,000 hours.
More Advice
A number of other service items can reduce headaches on the water:
1. Use fuel additives whenever possible, and stabilizer when needed, to reduce carbon build-up and fight the problems created by ethanol.
2. Fight corrosion on battery terminals with terminal cleaner.
3. Spray down the cowling seal with a silicone spray to keep it supple and watertight.
4. Visually inspect the power trim and tilt rams and seals for any leaks, and retract the rams all the way in during extended periods of non-use.
5. Each spring, inspect the cooling system outflow hole on the side of the motor to ensure it’s not clogged.
6. Finally, the best tip for any of today’s outboards: Buy gas at a busy station, and do not allow it to sit in your tank for more than a few months.
Original Article found in Mercury Marine’s Blog Site. You can read the original article, written by Joe Balog on the Basic upkeep of a Four Stroke Outboard Motors at https://www.mercurymarine.com/en/us/dockline/four-stroke-maintenance/?article_type[]=how-to.
Checking Power Trim Fluid
Keep your engine in peak condition by checking and changing your power trim fluid when necessary. This is a very important maintenance step.
This video and others like this video can be found on Mercury Marine’s Blog. You can find this original content on https://www.mercurymarine.com/en/us/dockline/quickbite-tips-checking-power-trim-fluid/?page=2&article_type%5B%5D=how-to.
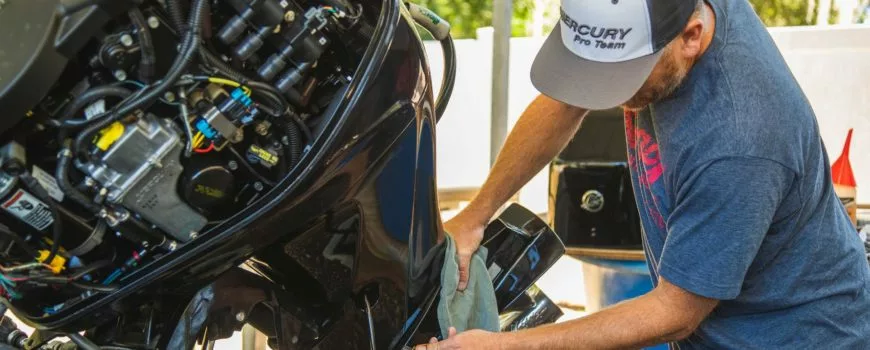
Caring For Your Outboards Cowl
Even the Cowl on your Outboard Motor deserves some attention. Follow the simple steps to keep your Mercury Outboard Motor looking fresh and new!
Just follow these simple steps:
Step 1
Wipe down the cowl with a damp cloth to remove water spots and dirt.
Step 2
Using a clean, dry cloth, continue to wipe the cowl removing any dampness.
Step 3
Using a clean, dry cloth, apply Cowl Finishing Compound directly to the outboard motor’s cowl. Paying particular attention to any scratches, rub the compound in a circular motion evenly across the surface. To avoid the compound drying too quickly, do not apply in direct sunlight.
Keep your outboard motor’s cowl looking new with these simple steps:
Step 4
Similar to car wax, let the compound set up and dry.
Step 5
When the compound is dry, use a clean, dry cloth to buff the compound off the cowl.
Following these simple steps, your outboard motor cowl will look just like it did the day you brought it home from the dealership! Watch the video below for the tutorial.
Similar to car wax, let the compound set up and dry.
Following these simple steps, your outboard motor cowl will look just like it did the day you brought it home from the dealership! Watch the video below for the tutorial.
As described in Mercury’s Dockline Blog – https://www.mercurymarine.com/en/us/dockline/how-to-easy-cowl-care-for-outboards/?page=3&article_type%5B%5D=how-to it’s pretty simple to keep your cowl looking clean and new.